My current working PC is a Dell Studio 1537 Laptop. This Laptop is configured with two Operating Systems; the first is Windows XP Pro, the second is Linux, more precisely Kubuntu.
Kubuntu is my [favourite] working OS, however the rest of my family “prefer” Windows for “Gaming”, I occasionally need to be able to use Windows in native mode for my work (I am a Webmaster for several Websites) so I need to see how they work using Internet Explorer :-(, mind you I usually use Virtualbox on Kubuntu to achieve this [but it’s a little slow], so I have a Dual boot which is managed by Grub. I have been playing with different versions of Windows on this Computer, the pre-installed OS was Windows Vista, which quite frankly, sucks. So I tried to install Windows XP Pro pretty much straight away. I gave up when I encountered the Blue Screen Of Death (BSOD) and subsequently installed the 90 days Windows 7 Enterprise trial.
This Version worked very well, only to shut down every hour as it was,after all, a trial version. So I had to find a solution to this, I finally decided to retry installing Windows XP Pro as there was no way that I’d re-install that joke of an Operating system called Vista.
The other problem, is that MS Operating System overwrites the MBR (Master Boot Record) and therefore prevents me from having Grub giving me the options of which partition I want to boot from.
So here is walk through of how to:
- Backup the MBR (which is always a good idea by the way)
- Change the BIOS “Onboard Devices>SATA Operation”
- Install Windows XP Pro on the first Partition
- Install [almost] all the missing Drivers
- Re-install the backed up MBR and reconfigure Grub afterwards
In the past, every time I was re-installing [any] Windows, I never managed to figure out how to overcome the MBR being overwritten, the HowTo’s where very daunting and I always resolved the problem by re-installing the Linux OS afterward due to lack of spare time, as a side note, one of the recommendation I have is that: it is always a good idea to have a home (/home) partition separated from the root (/) partition*.
Linux is more forgiving than Windows (and, shall I say, less monopolistic) by gladly allowing several OS’es living side by side on the same Hardware and thus performs a multi-boot initialisation operation after each fresh install.
The other challenge is that this particular version of Hardware [Studio 1537] is not supported by Dell to run Windows XP Pro. That makes work just a little more difficult.
So here are the steps in more details…
1) Backup the MBR
To backup the MBR of a Disk with Linux is really simple. Open a terminal window and type:
sudo dd if=/dev/sda of=/media/External/sda.mbr count=1
Where /media/External can be an external Hard drive or USB stick etc… It’s best to have this file saved out-with the Hard Disk Drive that will be worked on, just to be on the safe side.
2) Change the BIOS
At boot. press F2 and go to the Onboard Devices>SATA Operation and change AHCI to ATA. Save the configuration then reboot. (this operation is only needed once, subsequent re-installs do not require this step)
3) Install Windows XP Pro on the first Partition
My System has a couple of Partitions:
- sda1 = Windows + MBR
- sda5 = Linux / + Grub
- sda6 = Linux /home
- sda7 = swap
Obviously Windows must be installed on the first Partition and that’s where the MBR is.
Simply insert the Windows XP Pro installation CD, tell it to use the first Partition (optionally format it as NTFS) and follow the installation instructions. This will install a working version of windows with minimal functions.
4) Install all the missing drivers
Once windows has finished being installed, all the drivers [that have not been already installed, and that’s quite a few] must be installed. This is where it is getting a little tricky. Due to the futile nature of the web, it is like looking for a needle in a haystack in most parts, not to mention the huge amount of websites that try to entice you to install their rogueware. The first descent source of information regarding the required drivers I have come across is Dell Studio 1535 converted to XP Professional (this link is now rotten) by “Wickman Studios”. Most of the drivers are available here. For my particular configuration, it’s been trials and errors, as I haven’t kept tab on the different drivers’ executables I tried, it is kind of difficult to be specific.
The last few drivers I needed that Wickman Studio Post did not have were the “unknown” device which I managed to solve with I found on Dell Studio 1537 Windows XP Drivers / Downgrade (this link is now rotten) written by “AZ cloud tech” which is also a good source of information.
I still had issues with the ITECIR Driver which I eventually found on the Lenovo website (this link is now rotten) (the link from the Wickman Studios was throwing a “zip file corrupted” error during install).
The final problem I still have is the 1394 Firewire Network adapter not being recognised, but I have disabled it as I don’t really need it, if you have any idea let me know 🙂
Once I got [almost] everything working, I installed all the Windows Updates and the [free!?] Microsoft Security Essentials (MSE) which is the only thing I will ever recommend to use from Windows, that’s rare coming from me, trust me.
5) Re-install the MBR and reconfigure Grub
For this part, I wish to thank John S. Denker for his information regarding How to Reinstall Grub Onto Your MBR which was extremely useful and the first clear and concise Howto I managed to follow and recover my Dual boot system with.
After a few lots of trials and errors I managed to get the Dual boot working. Here’s the final order I used:
- Back up the MBR before anything else
- Restore the MBR without disturbing the current partition table
- Get the system to boot, note: my $partition on point 6 is sda5 but it might be something else for your System, So I am not responsible if your system fails!
In my first atempt to install Windows, I had a fail due to a problem with the sda1 Partition, there was a formatting issue (probably due to the fact I installed winXP without reformatting the old Win7 Partition first), so when I tired to do a Follow up I got a “Stage 1 error” this problem got fixed when I did a full NTFS format prior to installing Windows XP again.
I also played with Using Grub Command Directly as before the re-install I was faced with the grub> command prompt at boot :-(, so just for the record, my root device is /dev/sda5. In addition as I had grub 2 installed, the correct command went from root (hd0,<tab> to:
set root='(hd0,<tab>
which in full is (don’t ask! It’s for the Record):
set root='(hd0,msdos6)'
Subsequently, the next command looks like:
linux /boot/vmlinuz-... root=/dev/sda5
Well, that’s it in a nutshell, I hopefully will not need to perform any of this again, as I made an disk image of sda1 with partimage and dd which is safely stored on an external USB Hard Disk Drive, I also have a complete backup of all the web pages, Zip archives and exectuables mentionned in this post just in case. One knows the elusive nature of the Web these days… So I hope this was worthwhile and may prove useful to someone else, in which case, good luck and let me know how you did.
*That way I can format / without losing all my stuff and simply mount my home Partition as /home after my install. This is also very useful when doing an upgrade as I know that none of my Data will be overwritten, I also do regular backups, that goes without saying.




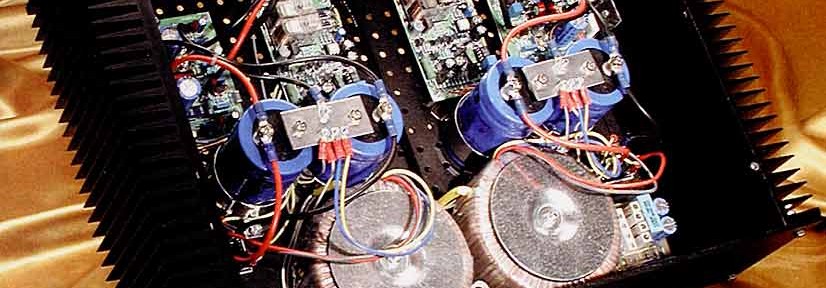
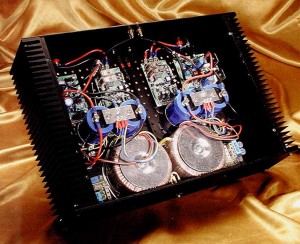 Back in 1985 I build a Hi-Fi Power amplifier, I still have the blue prints and I am keen to rebuild it. These days, with MP3 gizmos, music kind of lost it’s spark, It’s amazing how much presence is felt when you play a good old Vinyl, no wonder it’s coming back into fashion!